|
11/20/2017 0 Comments WHO NAILED IT? SWEATER NAILS TUTORIAL 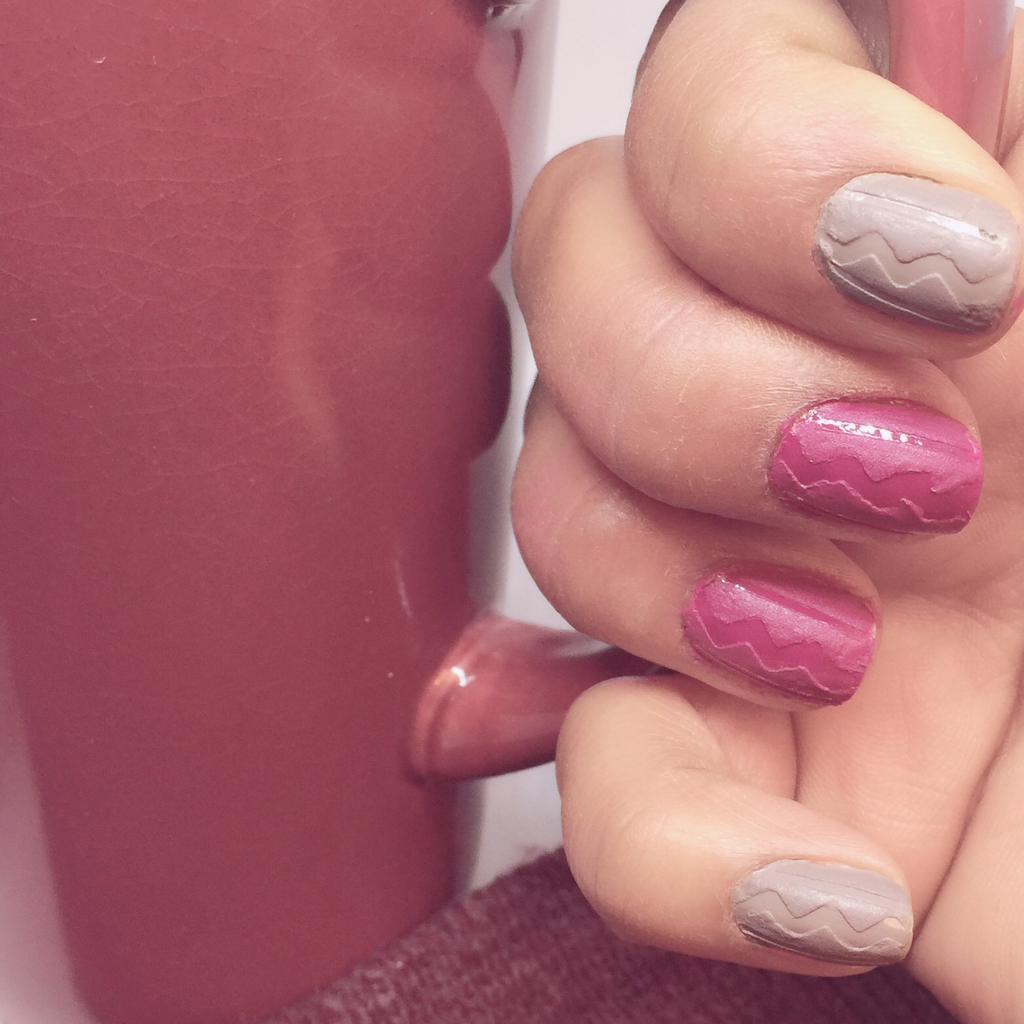 Have you seen these on Pinterest or Instagram only to find a tutorial that includes hours of carving and uv lamps? Well, me too. If you didn’t get a chance to see this nail trend in my post about my Top Ten Favorite 2017 Fall/Winter Nail Designs - i suggest giving it a read. This came in number one! I figured out a much easier way to create this look without hours of smelly damaging gel nails! Read More to find out how you can do it yourself! 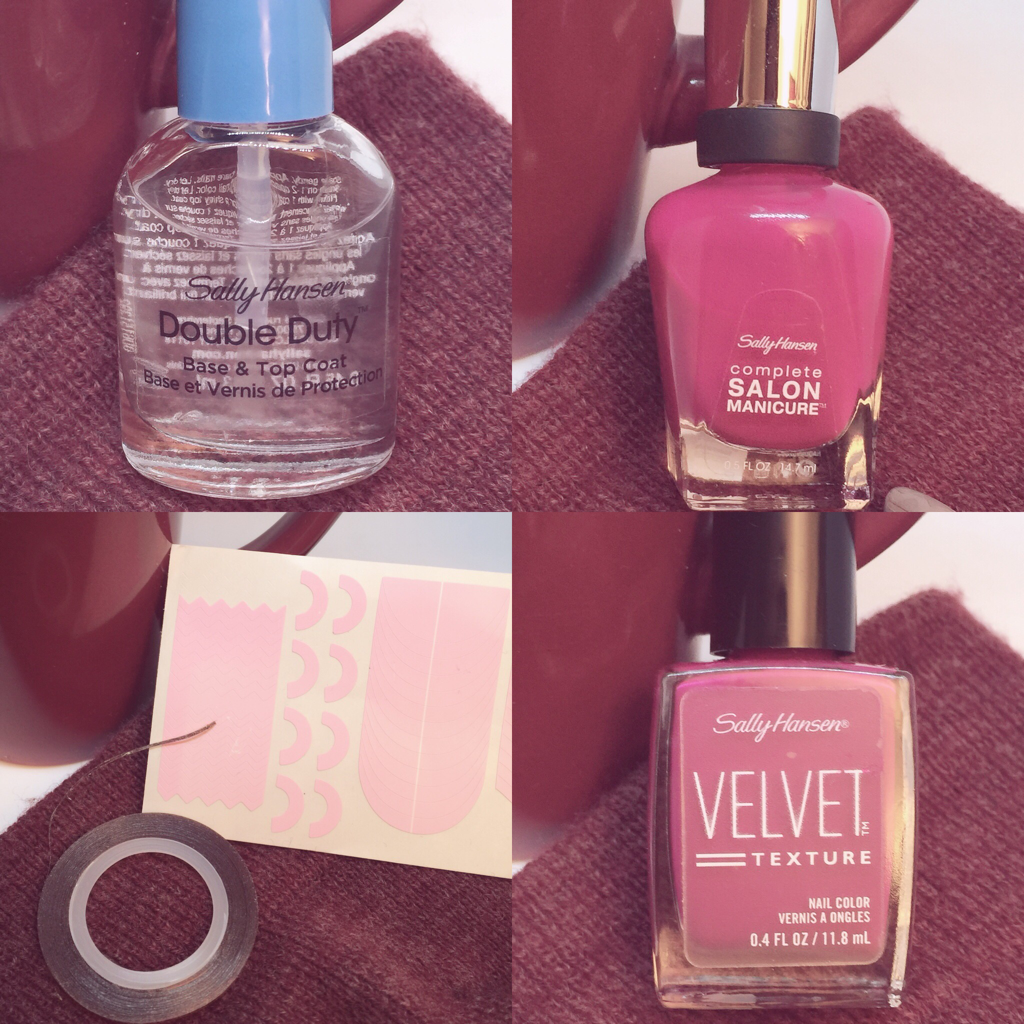 You’re going to need some things. Any base or top coat will do, I used this for to help me save some time photographing and switching brands. Same goes for the nail polish - you can use any brand as long as you can find a corresponding textured or matte finish color to use with it. You will also need nail tape and tip liners. You can find them at any drug store but make sure they have the zig zag ones since that’s what we will be using. 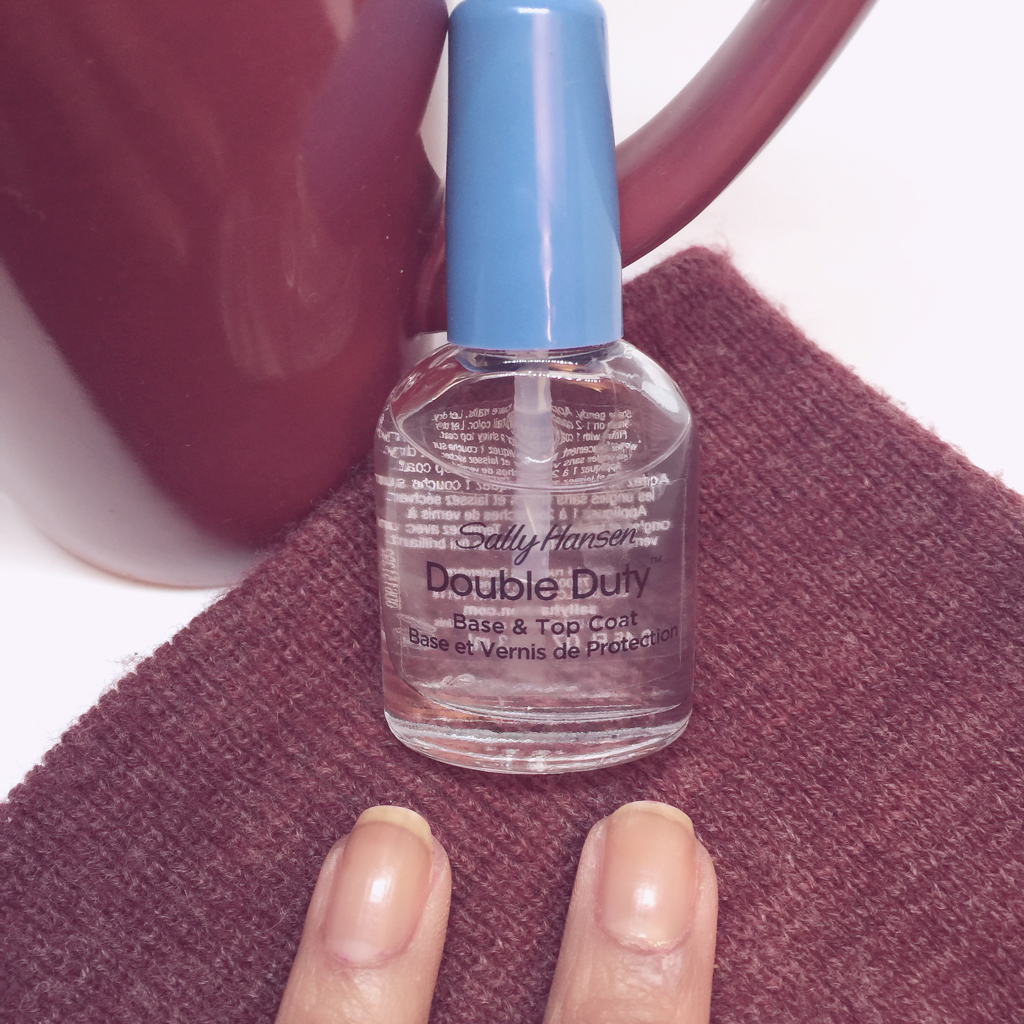 First, Give yourself a base coat. Not rocket science. 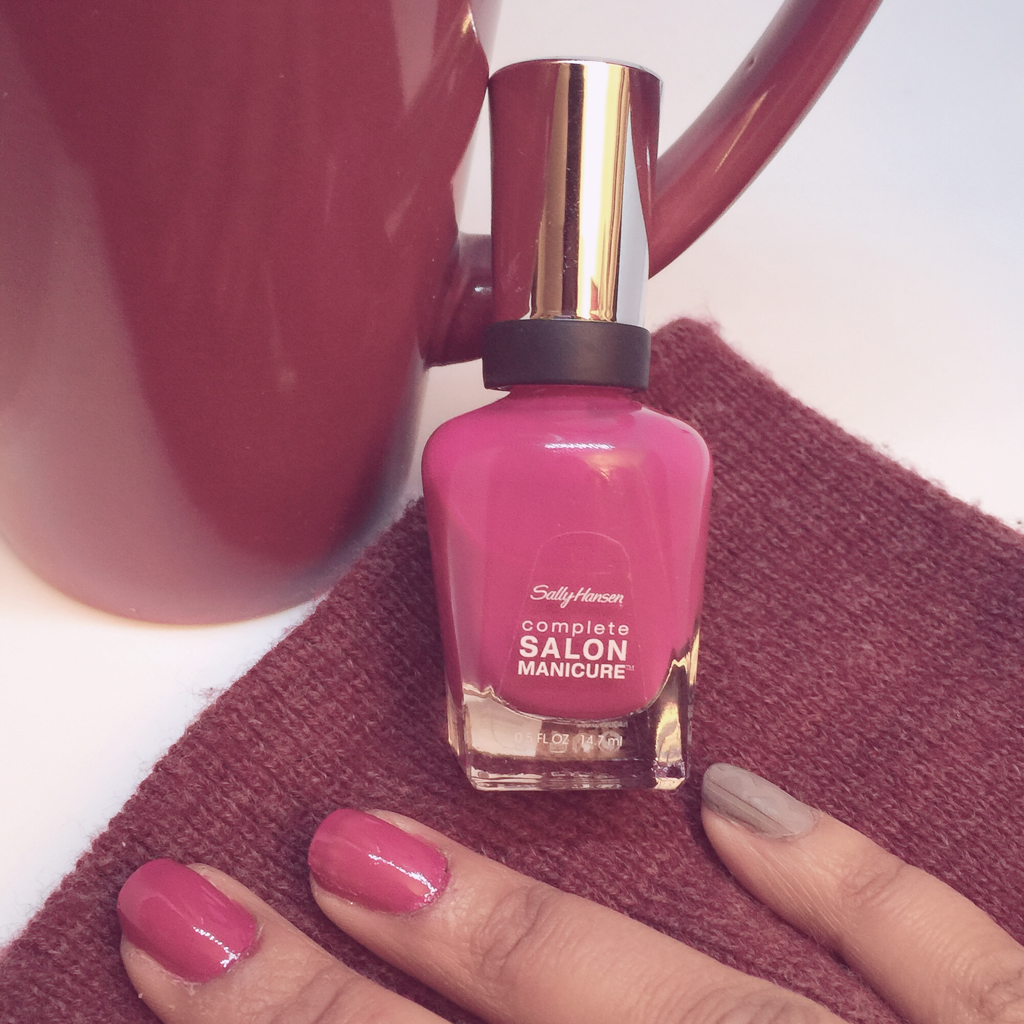 Second, apply two coats of your base color. No more. It doesn’t need to be perfect and if you put too many coats on, your situation is going get real gross, real fast. You’ll end up in that dreaded ‘never dry’ zone. 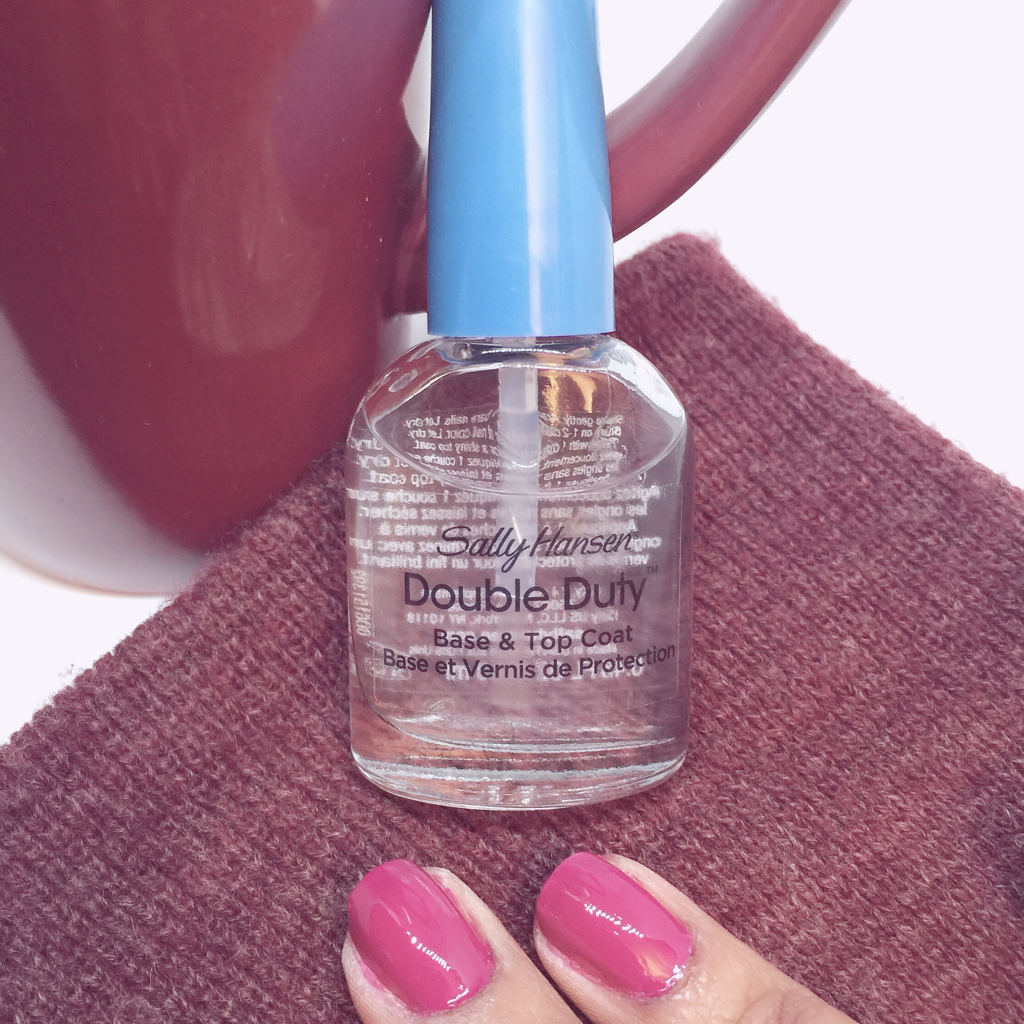 Next, after letting these coats dry all the way, Apply a thin coat of top coat. I suggest always doing this with tape, stamps, or any other type of topical nail decoration. This creates a seal. When you apply whatever decoration you want, the underlying color won’t try to join the party and muddle everything together. 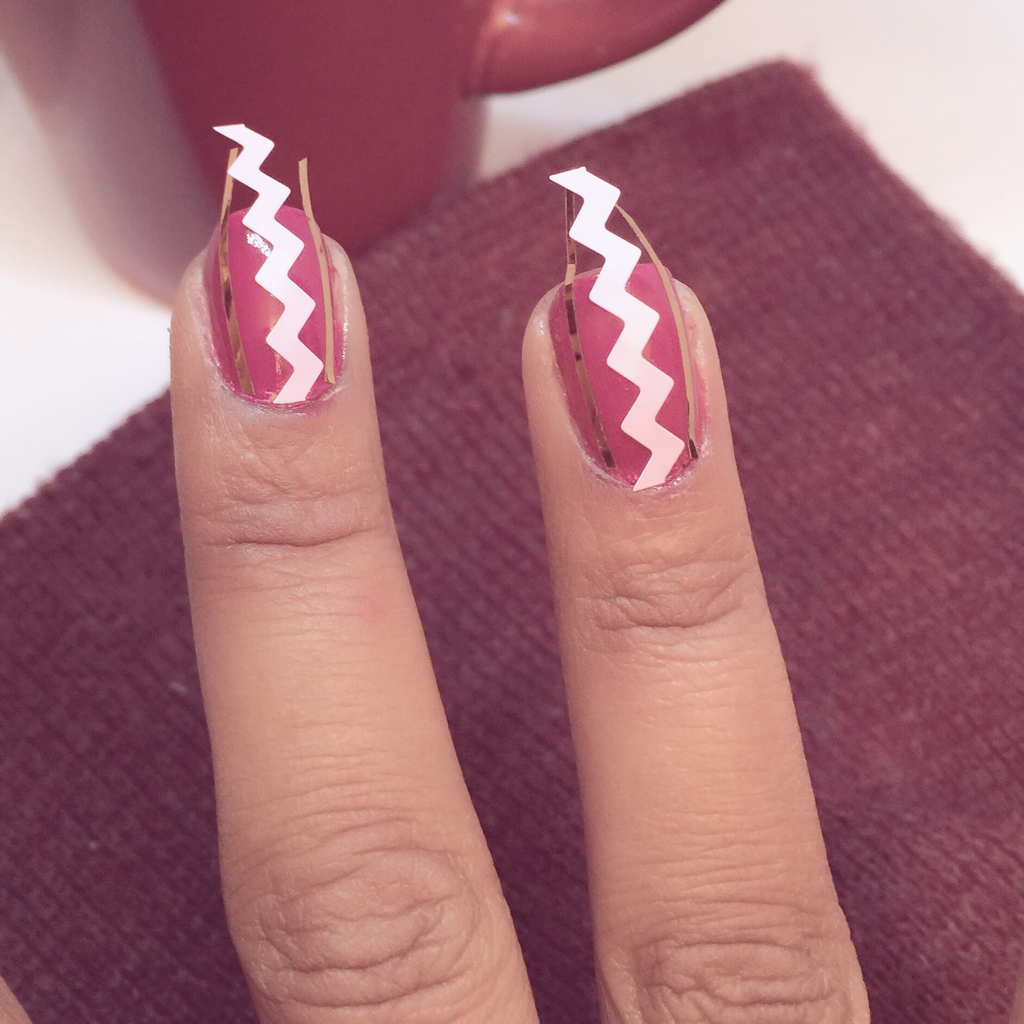 After that. Arrange the cable knit pattern. Place the zigzag liner straight down the middle and then ad a piece of nail tape to each side of the zig zag like pictured above. 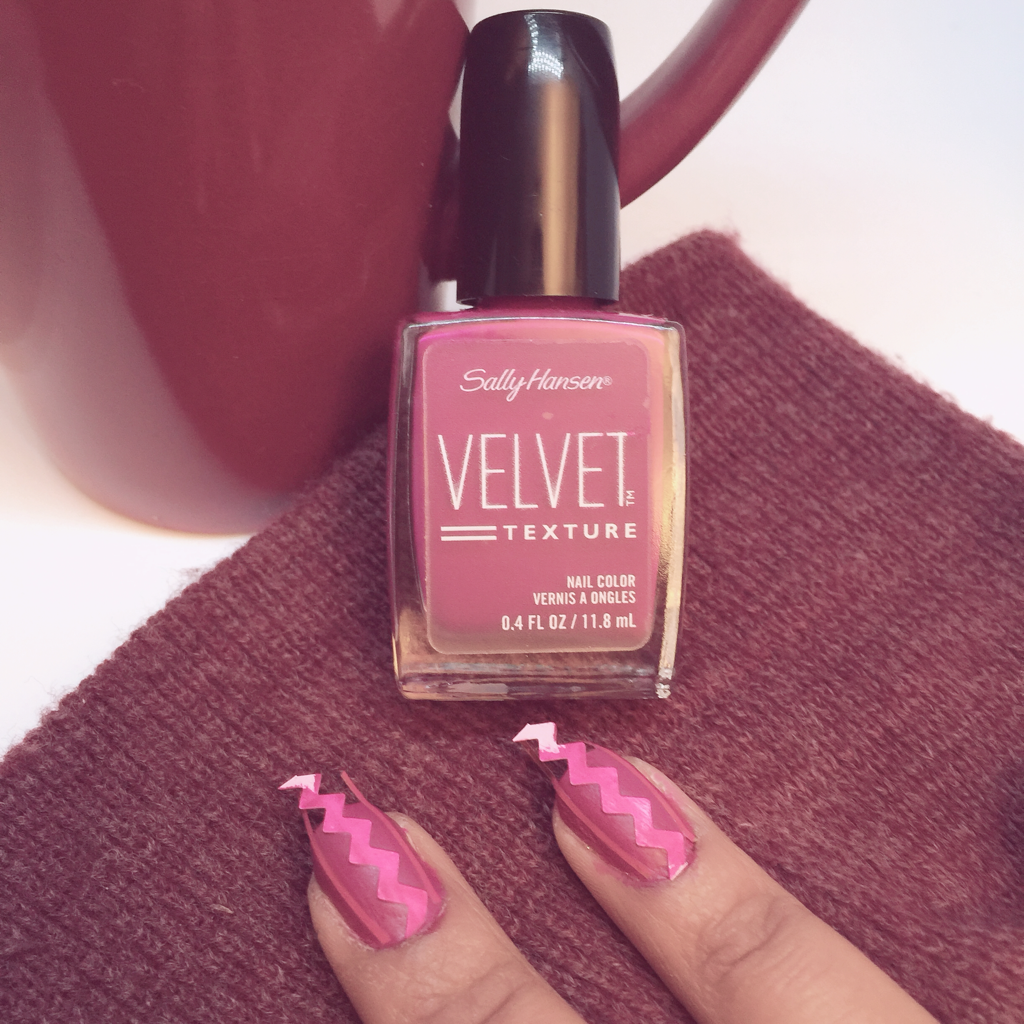 You are now ready for the first coat of your textured or matte nail color. Let the first two coats dry completely with alot of time in between until they are totally dry. This creates a solid foundation. 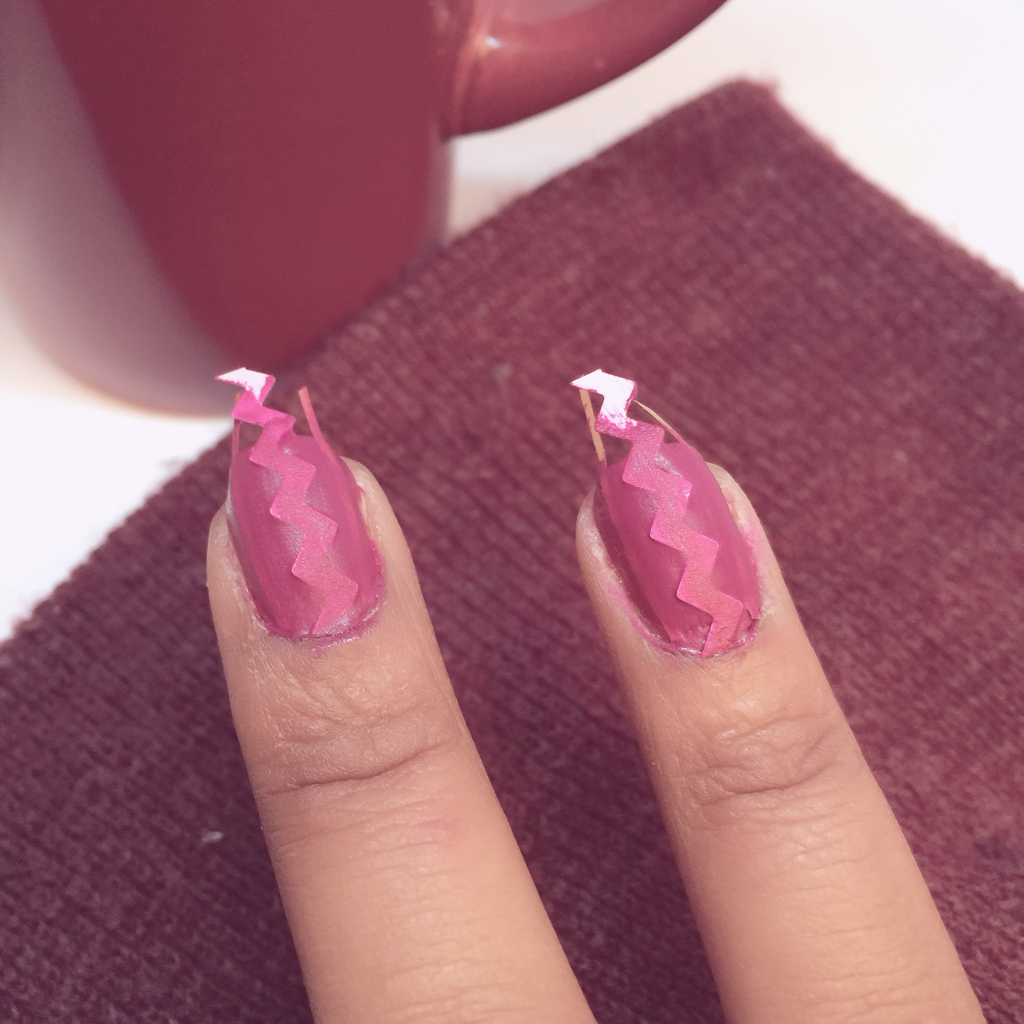 Now this next coat is where it gets a little weird. Instead of allowing it to dry like you did the first two coats, remove it almost immediately after application. This allows for a very smooth and sharp transition when removing the tape.  And Voila! No top coat - just let it dry. You want the separate textures to show through. It took me a couple tries to get this just right but, I worked out all the trial and error for you, now you just have to give it a try!
Leave a comment if you have any questions or suggestions! Thanks for reading!
0 Comments
Leave a Reply. |
CategoriesAll 10 Day Reviews Deals And Steals Influenster Reviews Spoiler Vs. Real Thing Subscription Box Hits And Misses Top 10 Favorites Tutorials And Advice Was It Worth It? Who Nailed It? Archives
November 2018
|
 RSS Feed
